Monday, October 31, 2011

NOTD: Halloween Glitter Explosion

I'm not sure when purple became a Halloween color, but I'm not complaining. I used it as the base for my holiday mani, which I put on Saturday and plan to take off tomorrow (provided I can work from home and use my commuting time on nail stuff—right now it's looking good but I never count on it 'til I'm actually logged in since every now and then our internet provider has hiccups or the guy who admins the remote access tweaks something to make it more secure and locks a bunch of us out for a day or two). Here's what I've got winking up at me from my fingers right now:


That's two coats of Sally Hansen Xtreme Wear Purple Potion topped with the orange glitter in clear base pumpkin and then the silver and black in clear pumpkin. I so wish they gave these names, but I guess if they printed all those different labels, they might have to charge more than $2.49.


The above shot shows one of the hazards of working with these chunky glitters—the dreaded overhanging chad.


Yesterday I took my glittery tips to a nail meetup, where five of us polish lovers spent hours talking lacquer (and swapping it and enjoying a holo show and tell). Near the end of our time together, we cleared off thet table to take this group shot:


From the top middle, that's Rachel Marie, Katrina (whose other hand had a completely different set of wonderful holiday designs), Christine (who really should start a blog), me, and Diane (ditto on the blog; she brought two boxes of holos to show us, including some I'd never ever seen in person before). Rachel and Katrina brought gift bags for everyone; here's my goodies—that candle smells divine:


I also got some goodies from the swap boxes, but those will have to wait for another day, as right now I need to head home to pass out candy to the trick or treaters. Well, I don't have to, I want to, because I love seeing all the costumes.

Friday, October 28, 2011

Long-Term NOTD: Sally Hansen Spun for You

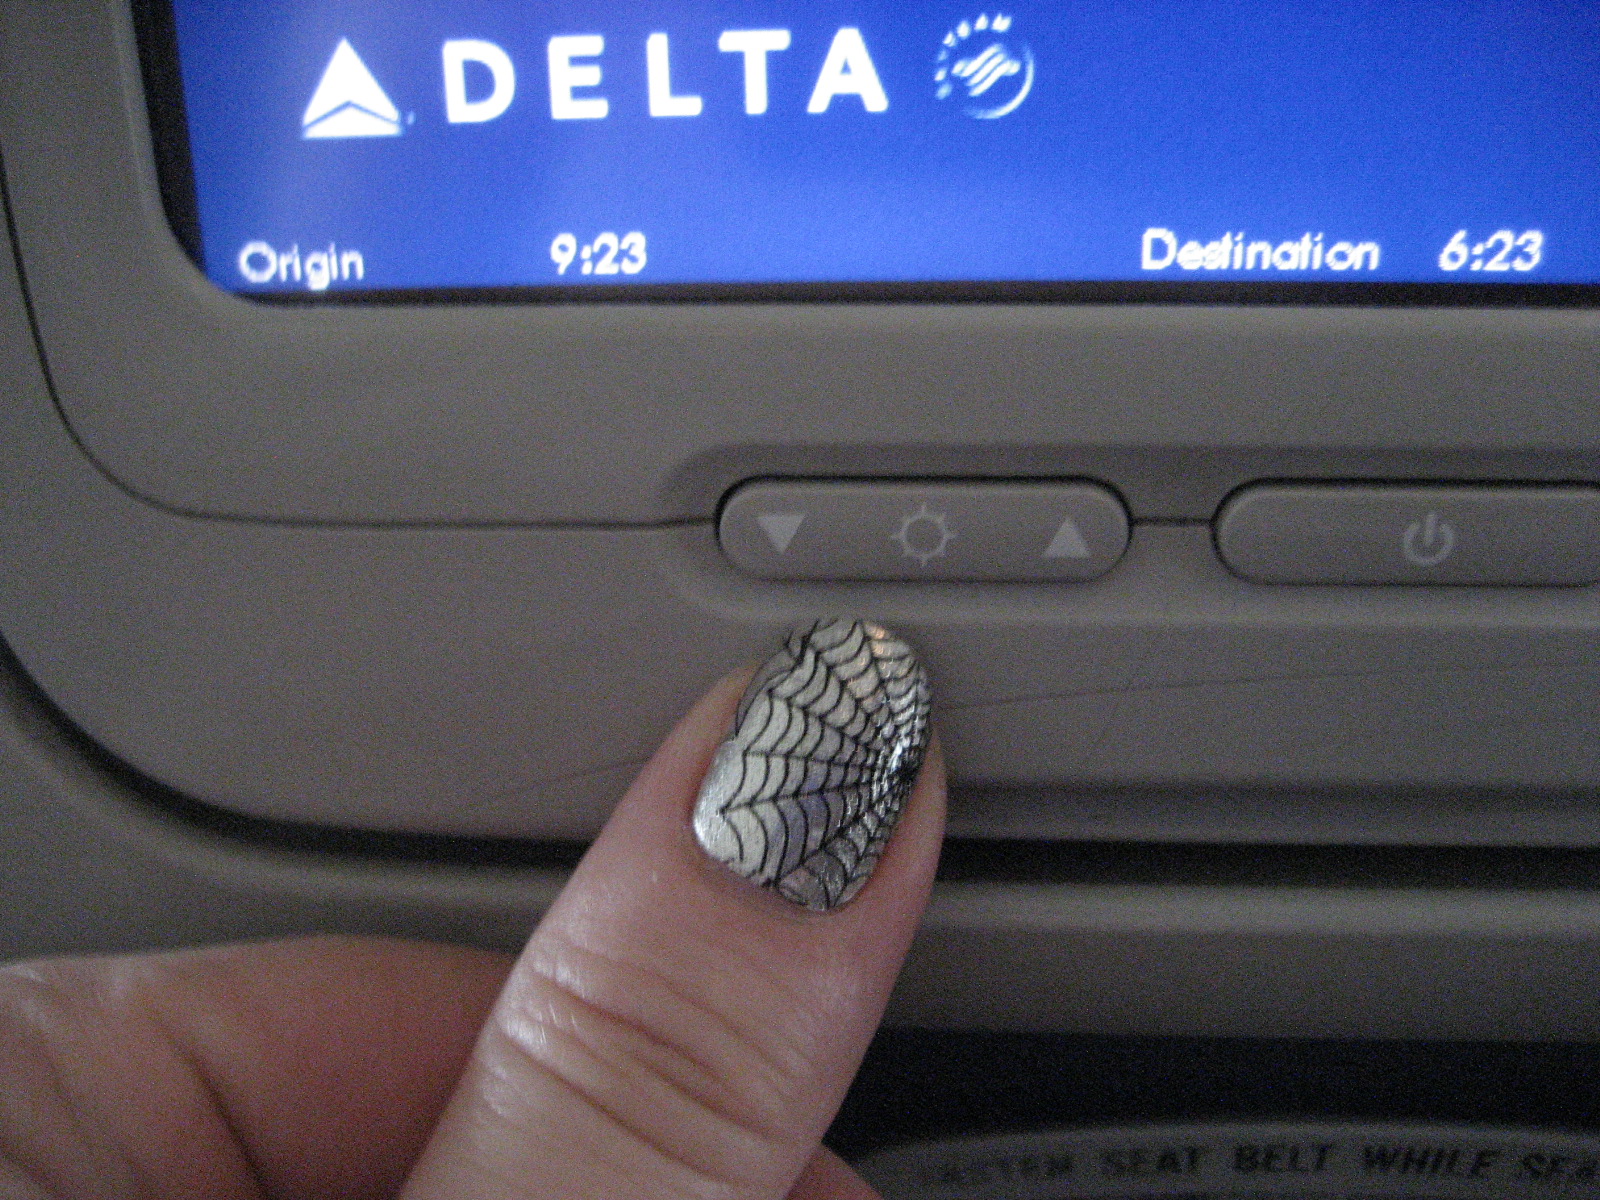
I am now caught up to my vacation nails. I figured one of the Sally Hansen strips Halloween designs would be perfect for my trip and decided on Spun for You, which is black spiderwebs on silver. I applied these late Friday night, the 14th, before we flew out the next morning. My nails were still short enough to use only one of the two packets of strips, so I packed the other in case I needed to replace a strip or got a sudden hankering to do my toes to match. (I'd painted them earlier with OPI Your Royal Shine-ness topped with OPI Crown Me Already—blingy silver for our silver anniversary trip. If feet don't freak you out, you can click here to see; the combo was so shiny it confused my camera when trying to focus.)


I was especially tickled by how the webs fell on my right hand; the center of one on my ring and other sections of the web radiating out on the other fingers.


On the plane out to California:


With a ginormous leaf I picked up off the ground on one of our strolls around L.A.:


With a Halloween balloon at Disneyland:


I would have bought one of these shirts, with silver spiderwebs on black, if I could have found one in my size:


And now we've come to the part of the story where sensitive souls might want to look away ... Thursday evening I zipped out of the hotel to buy a gift bag to put a little present for our future grand niece in (we were meeting my niece and her husband for dinner), and getting back into the rental car, I reached for the door without paying attention and this happened:


And I thought the rip I got a few weeks back was bad? This was way worse. We were running a tiny bit late for dinner, so I wrapped that mess up in an off-brand Band Aid from my toiletries kit and did my best not to think about it. After we got back to the hotel, I sat down to do damage control, only to find this in my purse:


Because I am a crazy nail person, I was traveling with two glass files, so I didn't even have to deal with the not longer in one piece one when I sat down to deal with the broken nail and shorten the others so I wouldn't have one odd finger out. (I didn't even consider trying to patch it, since I didn't want to have to baby it for the rest of our trip.) When I removed the broken tip, it took a lot of the strip with it, but I'd brought silver polish (and silver glitter, and orange and black cremes, and matte top coat, just in case) so I was able to touch up the bare spot with that and it didn't look too bad. I even continued to get compliments on my nails the rest of the week.


We got back late Sunday night, ten days after I'd put these on, and they were still in darn good shape (not counting the break, which wasn't their fault). I've been so busy since then catching up that I still have them on my nails today. Yep, that's right; two weeks since I put them on and they're still hangin' in there. There's tip wear, sure, and a rather horrifying gap at the base of my nails where they've grown out, but all in all I'm amazed at their longevity. (The OPI silver I used for touch up is not holding up nearly as well, and it's only been on there half the time.) Here's a pic I snapped in the parking lot on my way into the office this morning:


I was so skeptical about these strips when they first came out, and I still won't pay full price for them, but I am a convert now for sure. I won't always wear them until they're so tackily grown out, but it's nice to know I can if I have to!

Thursday, October 27, 2011

Recent NOTD: Butter London Toff Plussed

When I took off the Cut It Out strips, I saw no new damage on my nails so could keep most of the length that had grown out since I last took a file to them; that was encouraging. I wasn't up for another treatment week, so I just used Nail Envy as a base coat and then my usual routine of Instant Artificials, color, and Sally Hansen Insta Dri top coat. The color in this case was Butter London Toff, one of the shades from their Autumn/Winter 2011 collection. Butter's website describes this as "A darker, dustier, brownish variation on a rose pink." Against my skintone, it pulled more purple than pink, which of course was fine by me. I used two coats.


It's been a while since I did a product line-up; here are all the bottles I used for this mani:


I am disappointed to report that Toff did not wear well on me. By day three, I had enough chips that I needed to do some touchup. As far as I could see, the chips couldn't all be blamed on a weak/peeling nail underneath, either, as is sometimes the case when Mr. Peelies is on a rampage. By day four, it was so bad that I did a complete coverup, adding one coat of Studio M Alter Ego, a dusty purple shimmer (this is the same as Color Club Alter Ego). The gold in Alter Ego really seemed to pop on the Toff base.


With a layer of the Sally Hansen top coat on top of the Alter Ego, the mani lasted out the rest of the week with no chips.

Wednesday, October 26, 2011

Wheel K5: More Pumpkin Polishes and Some Tombstones

This week's pumpkins for Nail Wheel Wednesday are joined by some tombstones, all of them bought this year at Meijer and Rite Aid and CVS. Some of the pumpkins are much prettier than I expected based on how they looked in the bottle; I hope there are more like those in this year's snowmen (which have already started showing up at some stores, but my Meijer didn't have them as of this morning).

Nail wheel

(no topcoat, though a lot of these could really use some)

1. Lilac small glitter (3 coats)
2. Blue small glitter (3)
3. Green small glitter (3)
4. Multi small glitter (3)
5. Multi hex and small glitter (3)
6. Black hex and small silver glitter (3)
7. Orange hex and small glitter in black base (2) [nearly a one-coater]
8. Silver hex and small glitter in black base (2)
9. Silver hex and orange small glitter in murky base (2)
10. Silver hex and pink small glitter in clear pink base (3)
11. Holo bar glitter (4)
12. Flakies and glitter in purple base (3) [these are the sticky up kind of flakies, so a bit tricky to work with, but still pretty]
13. Hex glitter and holo moons (3)
14. Orange and black string glitter (3)
15. Orange hex and bar glitter (3)
16. Wet 'n' Wild Fantasy Makers Creepy Pumpkin (3)
17. Wet 'n' Wild Fantasy Makers Purple Potion (2)
18. Wet 'n' Wild Fantasy Makers Black Magic (2)
19. Wet 'n' Wild Fantasy Makers Black Pearl (2) [almost a one-coater]
20. Wet 'n' Wild Fantasy Makers Vamp Red (2) [really vampy, almost black]

Bottles 1 through 5:


6 through 10:


11 through 15:


16 through 20:


Nail wheel

Nail wheel

Nail wheel

Nail wheel

Nail wheel

Nail wheel

Nail wheel

Nail wheel

Nail wheel

Nail wheel

I still have some pumpkins I haven't gotten onto a wheel; with no more Wednesdays between now and Halloween, I'll have to have Nail Wheel Monday or Halloween in December or save them for next year, depending on how soon I get around to them.

Tuesday, October 25, 2011

Recent NOTD: Sally Hansen Cut It Out

So when we last looked at my nails, they were shorter than they'd been in some time and coming off two weeks of rehab with OPI Nail Envy. I mentioned that I'd run out of patience for having unadorned nails at that point. I knew they still needed treatment, though, so I compromised and put on one coat of Nail Envy (Sensitive & Peeling formula) under some Sally Hansen strips in the Cut It Out pattern from the core collection.


In putting them on, I realized a good thing about having shorter nails is I'd be able to get a full mani from only one of the two strip packets. It took me a few nails to figure out that cutting the strips in half before applying was the way to go, so I ended up with some wonkiness. I rationalized that since it was such a busy pattern, no one was likely to notice the parts where I'd messed up. I did have to cheat a bit on some of the nails and leave bigger gaps than I'd normally do, but it was worth it to me to be able to leave that second packet "factory sealed" since these strips will dry out and become inflexible once they're out of that packet. I've had some luck slipping leftovers into the plastic sleeve the file in the package comes in and wrapping them up tight with tape. I've been able to use those to replace a strip when I've ruined one on my nails in the same week, but after a few weeks, air does sneak in and dry out the strips. I'm still pondering a better way to seal them up or some way to re-wet them after they've dried, but in this case, I've got a fresh packet of 8 strips ready to go.


Now, I don't know about you, but for me, all those white spaces with black outlines were just begging to be colored in. I lasted four days before I gave into temptation and got out my Sharpies. (A sidenote: cleaning up stray Sharpie marks is harder than cleaning up nail polish slips.)


As with other patterns I've tried, I got great wear out of these; they were still in good shape when I was ready to take them off.

Monday, October 24, 2011

I'm Back

As promised, here I am back to blogging after my time away, which I can now reveal that I spent vacationing with Mr. Karen in California. This trip was to celebrate our 25th wedding anniversary by returning to the region where we'd spent our honeymoon so many years ago—more years than some of you reading this have been alive, I know! Here I am on my wedding day back in 1986:


I've got a lot of catching up to do (this is the first day I've sat down at a computer since October 14th) so no nail stuff today, but I do have this picture I took at one of the stops on our vacation, Disney California Adventure theme park, where we took in the World of Color show (that park wasn't even built back in 1986):


Looking at my backlog of nail photos, which isn't too big right now since I used so many while I was doing those treatment-only weeks, I think I might get to my vacation nail news by the end of this week, so stay tuned!

Friday, October 14, 2011

A Confession, Some Nudity, and a Break

The last time I posted an actual nails of the day entry was July 4th. There's nothing unusual about that; it typically takes me at least a few days to get photos out of my camera and into an entry. But you may have noticed that it's been a quite while since I posted even a recent nails of the day entry. Since late September, I've been working off my backlog of swatches, as I had to put my nails in rehab due to an unfortunate incident: my first ripped nail in I don't know how long. Peelies are pretty much a constant battle for me, but I'd been having really good luck with not getting rips and tears. Until a few weeks back, when I felt a nail catch on my clothes and instead of the hangnail I expected to find when I looked at the snaggy hand, I saw a rip in one of my nails. When I took off my polish (well, most of it), this is what I found on my left middle finger:


I was tempted to try and patch over the rip with a silk wrap or teabag, but as I recall that gets tedious to keep up, and besides earlier that week I'd been reaching for something without looking and jammed my right hand into a wooden railing, with this result on the middle finger on my right hand (this is after I filed back the part that was completely destroyed):


With two nails really struggling and a few others showing signs of Mr. Peelies, I decided it was best to just cut them all down to shorties and do a treatment week. Given how stained my nails were, I was somewhat chagrined to think of going out in public with nothing but clear coat between them and the world, but I reminded myself that I don't work at a beauty supply store, I work with computer geeks, most of whom pay absolutely no attention to my nails whatsoever. Here's my left hand, pre-rehab; it gets the worst of the staining because it's where I try out all the colors:


And here's that hand, freshly trimmed and treated with OPI Nail Envy Sensitive & Peeling, which I decided to try instead of my usual Orly Nailtrition or Nail Defense since those aren't completely making the peelies go away. My nails look so strange to me here, even though I used to keep them at this length or even shorter all the time.


I spent the next week applying another coat of Nail Envy every other day, per package directions. At the end of that week, here's how they'd progressed. My index finger was actually worse, but that damage was no doubt already done before I started rehab and just lurking, waiting to show itself.


I followed that with another week of Nail Envy, adding a new coat a couple of times during the week. After that week, here's what my nails looked like naked. Not at all pretty, I must say, though I guess the staining is better since I cut much of it off and some of the rest peeled away. I know it takes weeks for nails to grow out and the damage I'm seeing here is just going to take time to get past, but it's still discouraging.


At this point, I could not stand one more day of having nothing but treatment on my nails, but that's a story for another entry, which I will write after I get back from one of my periodic mini-breaks. I'll be spending next week mostly offline, getting reconnected with people who don't live in my computer or work in my office and refreshing my brain. I'll be back on the 24th or 25th, most likely. See you then!